
DIY Catnip Mouse Toy – Cuteness.com
DIY Catnip Mouse Toy – Cuteness.com
 SUPPLIES:
• Patterned fabric for mouse body
• Scrap fabric, preferably with a loose weave, for catnip pouch
• Cotton cord, ribbon, or rick rack for the tail
• Embroidery floss for face details
• Catnip
• Polyfil stuffing
• Needle and thread
INSTRUCTIONS:
1. Print out this pattern and cut out fabric as shown.
2. Tie a knot at one end of the cord for the tail and set aside.
3. For catnip core pouch, fold fabric in half, stitch two sides, add catnip, sew closed, and set aside.
4. Embroider a mouse face on the main fabric (we made two little eyes).
5. Begin at the nose and sew the two sides together along the upper edge.
6. Sew the tail at the back. Begin to sew the bottom piece to the two sides pieces, leaving a small opening.
7. Turn mouse inside out. Gently poke out the nose with a closed pen.
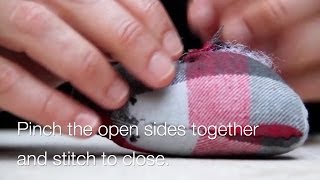
8. Add polyfil and catnip pouch.
9. Sew the mouse securely closed.
10. Hand it off to kitty to enjoy!
MUSIC: “The Afterlife” by YACHT
yes it would be useful to have the pattern!
Jesus Christ slow this down and explain a little more this was just ridiculous and completely useless
Where is the pattern for this? It’s not linked in the video description and there’s no link for it on Cuteness.com, either. Nor could I find a way to contact anyone on Cuteness.com to ask someone about it.
Where do you find the template?
Why would you bother to put the catnip in a separate pouch? Why not just put some into the mouse body with the polyfill?
nice 🐈🐈👌👌